Adding easy container management to Photon OS with Portainer

This is a follow-up to my post on setting up Photon OS on vSphere as a lightweight VM to run containers on. By the end of that post, I have the OS up and running with Docker Engine in place and enabled. This post will add simple, graphical container management to the host through Portainer.
You might ask, “Isn’t the point of containerized workloads, infrastructure as code, etc., that you can use the command line to manage your workloads?”. And you might be right. But right now, I’m not building dev environments; I’m bringing up relatively static components, prepackaged containers, that will deliver some sort of service in my network. And I won’t be deploying, destroying and redeploying these daily. And since my memory has always been terrible, and I have more than enough I need to remember from my actual work, I’d have to be looking up these things all the time. So sometimes, a friendly, intuitive GUI is just a better option. The nice thing here, of course, is that I can still do both, choosing whatever works best for me at any given time.
Portainer comes in two different flavours, the free Community Edition, and the commercial Business Edition. The Business Edition is available for free for fewer than 5 nodes; for now, I’m installing Community Edition, but I might look at the BE too eventually.
Because I want the host VM to be “disposable” so I can rebuild it and the contents for whatever reason, I needed somewhere to put the persistent data of the containers, including the Portainer management container. So I made an NFS share on my NAS called conda because it’s for container data, but I’m too lazy to type it out.
Since the minimal install of Photon OS that you get when deploying the OVA doesn’t include the nfs-utils package that I need to mount the share, the first step is to install that using tdnf:
tdnf install nfs-utilsWith that done, I can make somewhere to mount the NFS share; mkdir/var/conda ought to do the trick. If my NAS has IP 198.51.0.10, this will accomplish what I want:
mount -t nfs 198.51.0.10:/conda /var/condaNow we have somewhere persistent to store the configuration or user data of the containers, it’s time to deploy Portainer.
docker run -d -p 8000:8000 -p 9443:9443 --name portainer --restart=always -v /var/run/docker.sock:/var/run/docker.sock -v /var/conda/portainer_data:/data portainer/portainer-ce:latestThis will pull the latest community edition of Portainer, and store the config data in /portainer_data on my NAS share, mounted in /var/conda on the VM. Once done, it should be accessible on port 9443 on the IP I assigned to the Photon OS instance. Set a password, and you’re up and running:
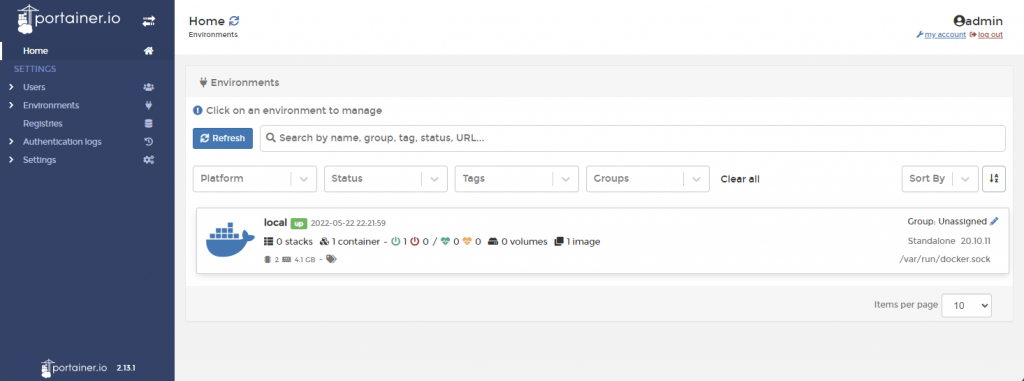
From here, you can deploy and manage both single containers, and you can do Docker Compose installs using what Portainer calls stacks. I’m not going to do an in-depth discussion on Portainer features, mainly since I just started using it, but their Youtube channel is an excellent source of info. Once I have stuff to discuss, I might do another post.
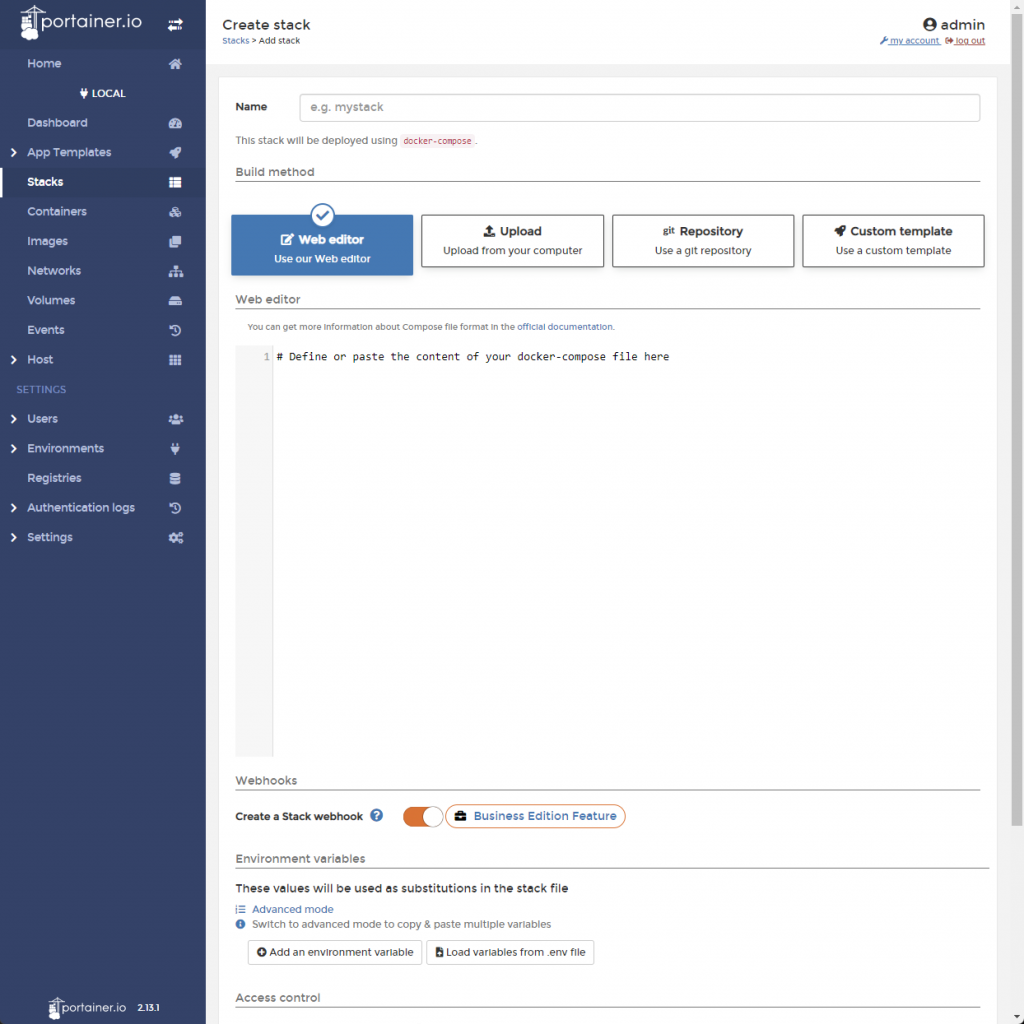
I’d like to highlight the Stacks feature, which is basically a UI for Docker Compose, where you can type your YAML right in their web editor, upload it as a file, or connect to a repository.


Hi, how do you compose a docker image that has the same network as the host?
I have created a PhotonOS docker using your previous article (https://blog.fjetland.com/2022/05/setting-up-photon-os-4-as-a-docker-host-vm-on-vsphere-7/) where you have defined your docker host as 198.51.0.2
After creating your Portainer, you’d see a bridge and a host if you go to Networks. The bridge network would be different from the host. How would you access the container you created?
How do you attach multiple IP addresses to docker host?
I need to setup three servers (using port 8888), so, following your network example, the first docker container would be accessible via https://198.51.0.3:8888, the second docker would be https://198.51.0.4:8888 and the third, https://198.51.0.5:8888
How do I accomplish this? Any enlightenment is appreciated and thanks in advance.
Hi Nick, thanks for the question.
Let me jump straight to the second question because I think the way I solved it will help frame how you approach the other two problems.
So, how would you access the container you created?
My approach is to let the containers remain in the docker network and instead use Traefik for routing and proxying.
So the containers have their own IPs inside the docker network, and for some internal and test services, I’ll just set them up on separate ports on the host’s IP and access them like that. But as you pointed out, running three containers on the same external port wouldn’t work.
For this, especially since most of these cases are web servers that I want to publish externally on port 443, I let Traefik work as a reverse proxy and let it handle all the port settings (mapping 443 to 8888, for example), domain name translation and even SSL cert issuing.
Traefik is powerful but maybe not the easiest to get going with. But alternatives like Caddy and NGINX will do much of the same.
This would be my recommendation to you.
If you still have a specific reason to require separate external IPs, I can only outline how I think it would need to be done, as I haven’t looked into it myself.
First, you must add the IPs to the docker hosts nic or multiple nics.
Then, you would need to define the IP and port mapping for the containers, similar to:
docker run -it -d 198.51.0.4:80:8888 –name web nginx
docker run -it -d 198.51.0.5:80:8888 –name web2 nginx
etc
But I would look into using a reverse proxy/load balancer. It’s a very different way of working from traditional homelab infrastructure, and it’s hard to get your head around, but I think it will be in your best interest in the future.
I hope this was of some help; please let me know if I made no sense at all or if I can help further.